Tutorial: Live Chat Plugin Setup
This tutorial shows you, step-by-step, how to successfully set up an Airy Live Chat Plugin on your own instance and customize it to your liking.


Introduction
Having a Live Chat plugin on your website has become essential. Connect with your website visitors, communicate with them in real time, or use a bot to automate FAQs.
Airy’s Live Chat Plugin comes out of the box fully functioning, and thanks to its open-source nature and React Render Props, you can customize everything about it.
Out of the box Airy’s Live Chat Plugin supports:
- Full customization of look, feel and features
- All message types, including emojis
- Rich Messaging with templates, cards and carousels
How to Create your Personal Airy Live Chat
- Set up your Airy instance
- Log into your Airy Core UI via your Airy instance and you will be guided to your Inbox
- Click the ‘Channels’ button on the left sidebar menu
- Click the '+' symbol to the right of the Airy Live Chat option

5. Click the ‘Connect Airy Live Chat’ button

6. You will be prompted to enter a Display Name and an optional Image URL - these will be used for internal purposes only, meaning that you and your team will be the only ones able to see these optional features
- The display name will be used as the conversation's name and the image URL will be used as the icon within the Inbox UI
- If you do not select an image, one will be assigned to you
7. Click the ‘Save’ button to save the changes you have made

Customizing your Airy Live Chat
For most use cases, the basic customization will be sufficient for you and your team because it supports the essential options to customize the experience. These customizations can all be made on one screen, which will be shown . However, if you need full control of every aspect of the plugin, we also offer the possibility of advanced customization with Render Props.
Airy’s Chat Plugin allows you to customize based on the needs of you, your team and your contacts. These customizations include, but are not limited to:
- Text displayed on your chat plugin
- Color scheme of your chat plugin
- Icon displayed on the button to open your Airy Chat Plugin on your website
- Welcome Message displayed when contacts open your chat plugin
- Height and width of your chat plugin
- Closing options for your Airy Chat Plugin (basic, medium, full)
- Option to disable your chat plugin for mobile browsers
After you successfully connect Airy Live Chat, you can customize it by clicking on your connected Airy Live Chat.

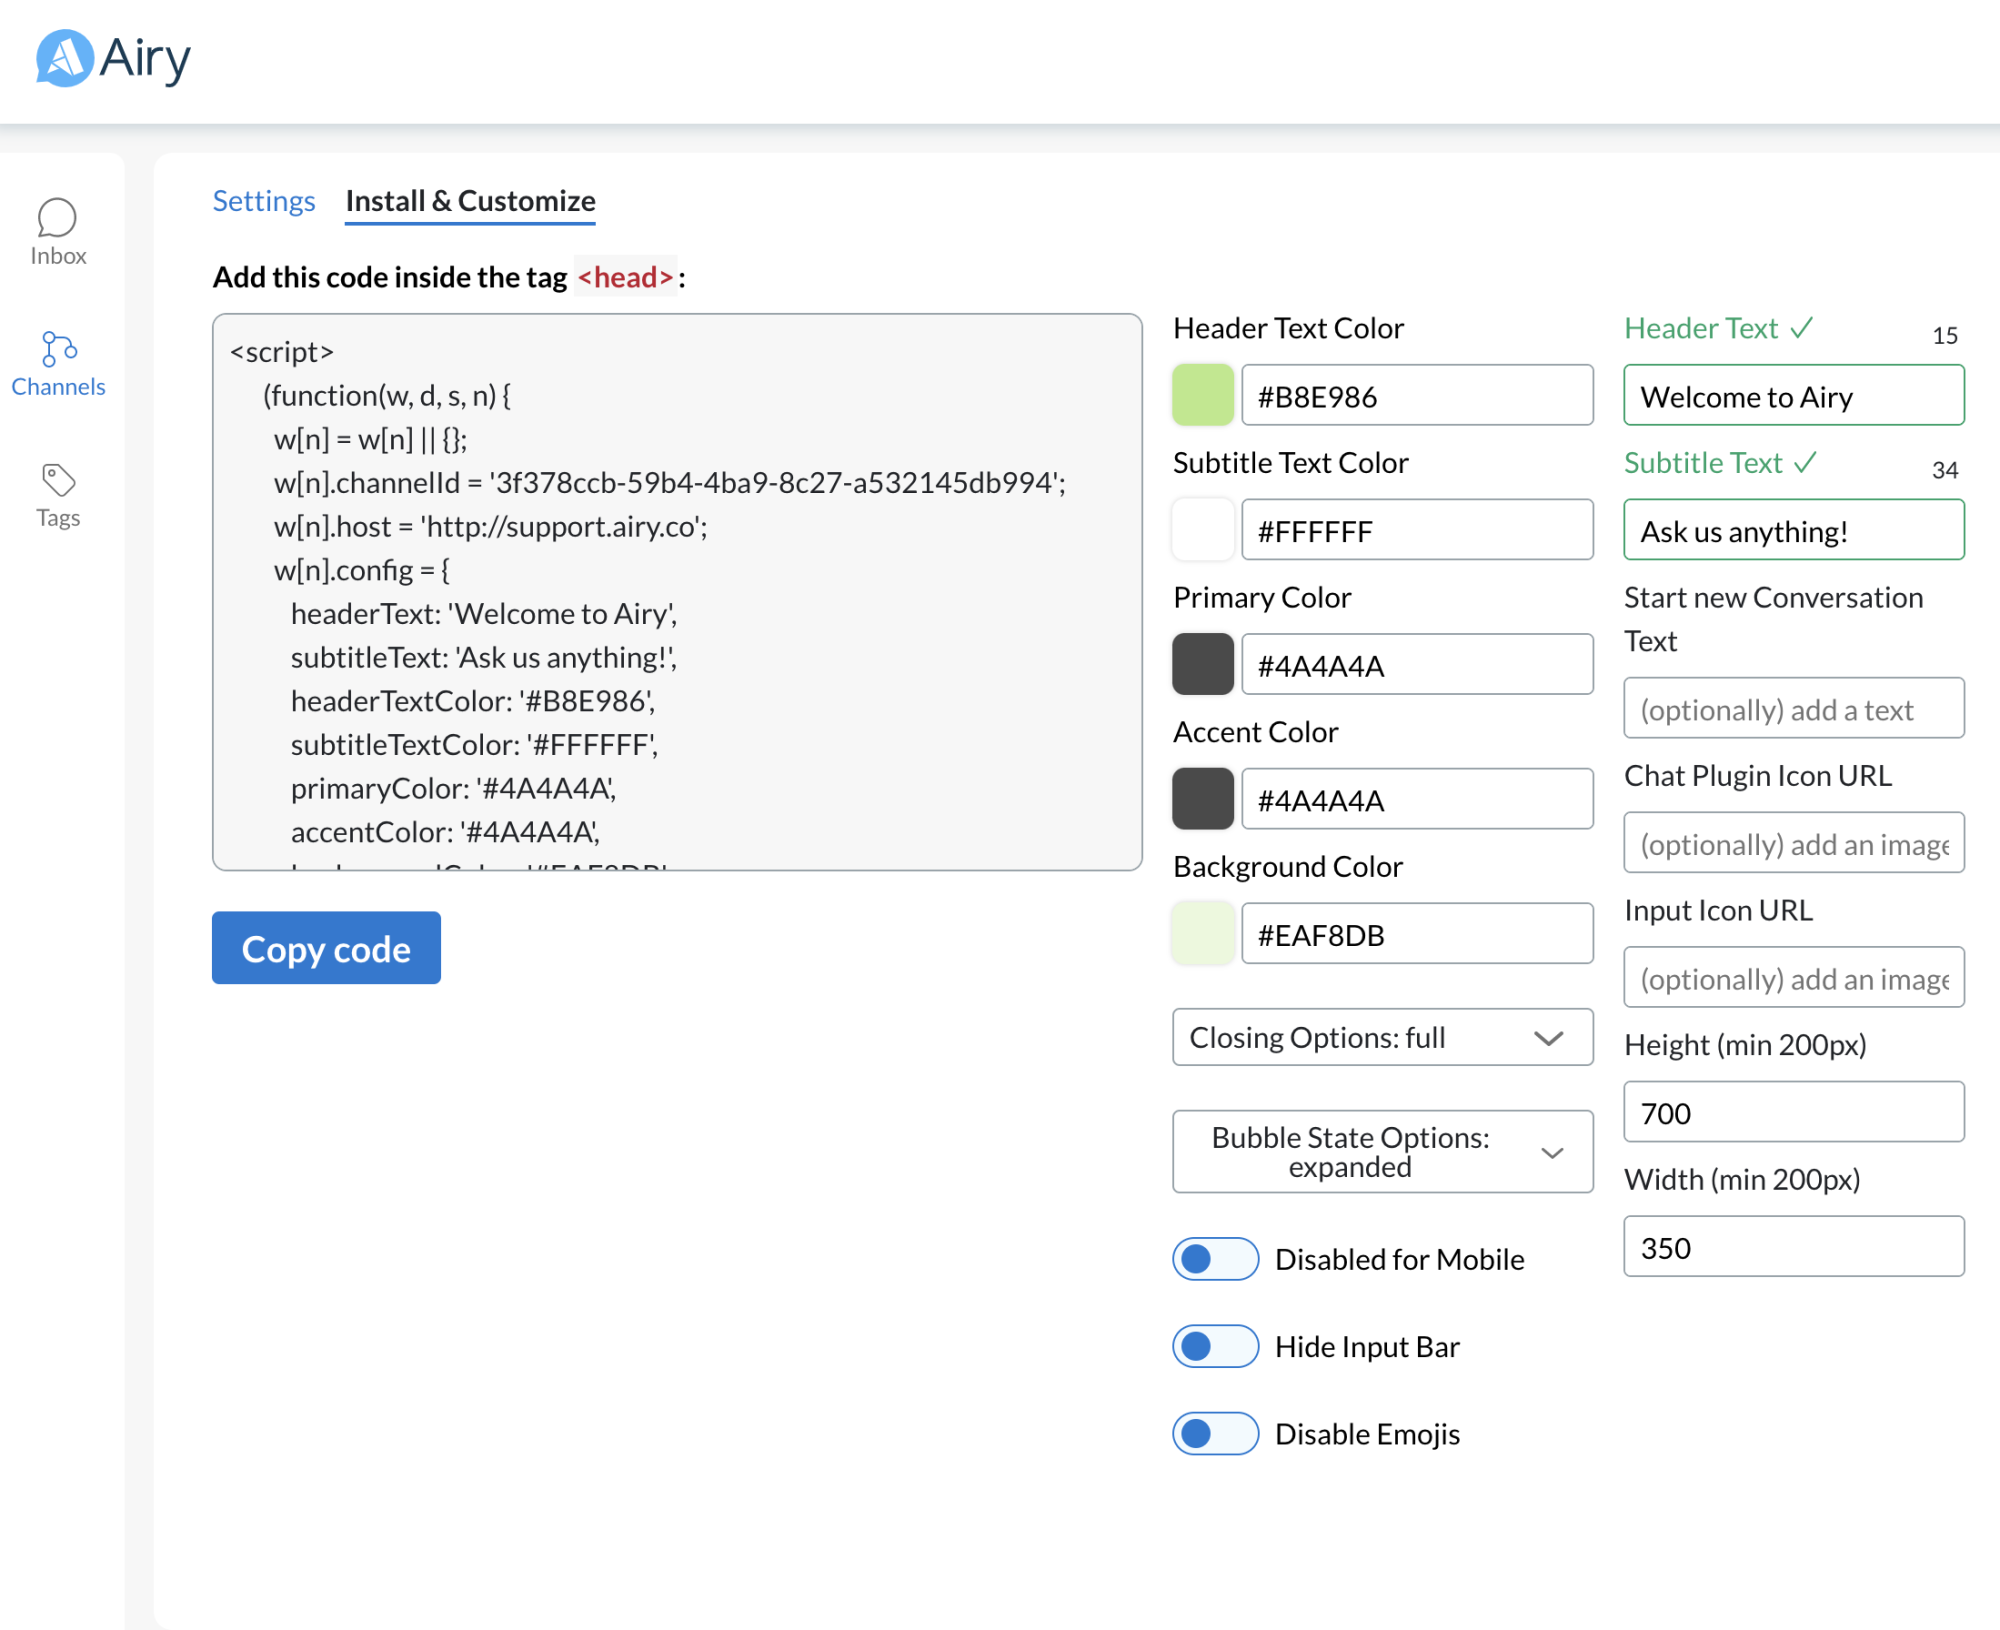
Once you click the ‘Edit’ link to the right of your connected Airy Live Chat channel, you can navigate to click the ‘Install & Customize’ option.

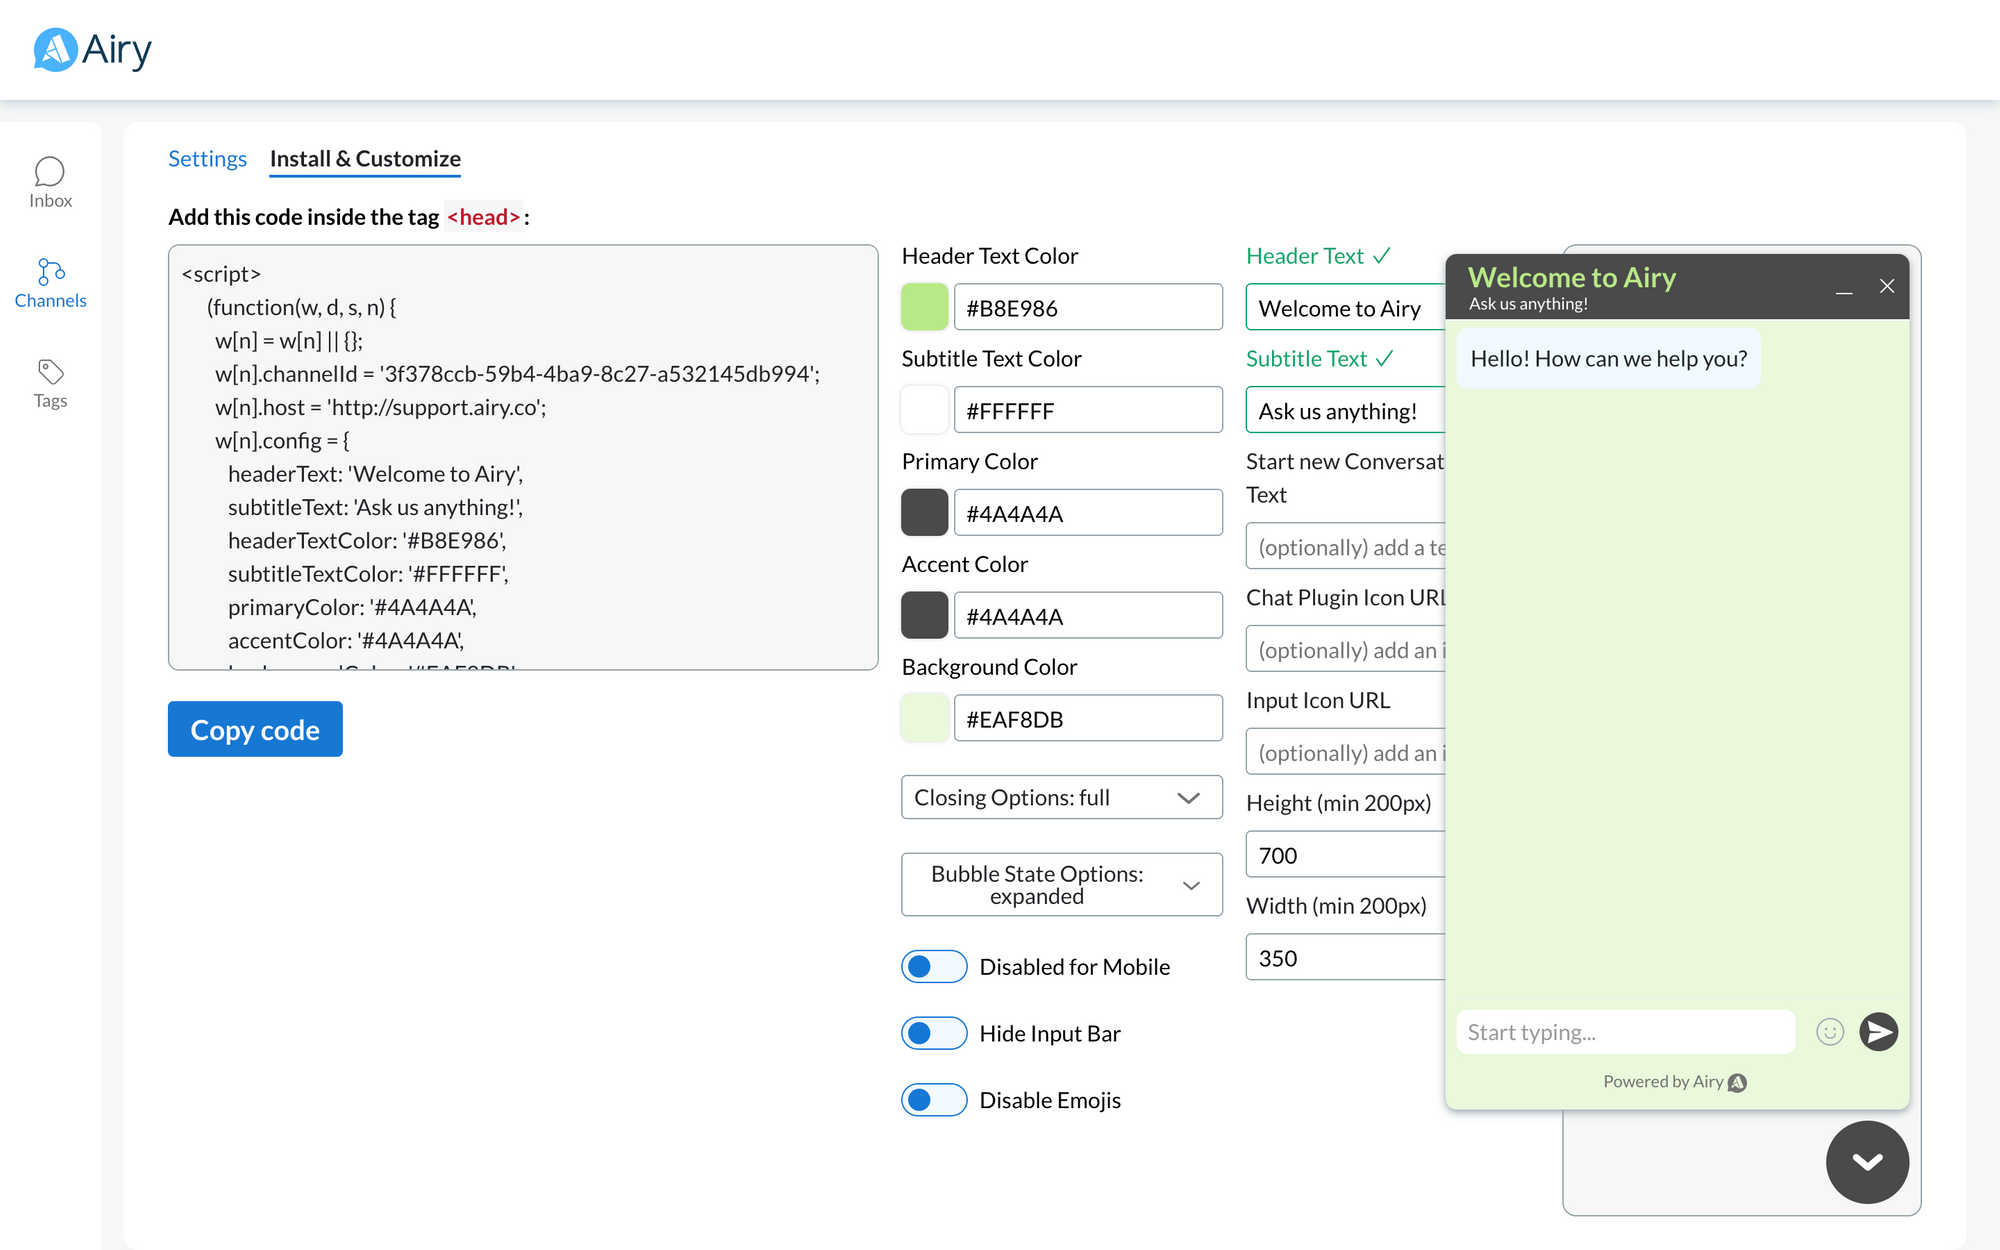
Here, you are able to customize your Live Chat plugin. You are able to customize several features, such as:
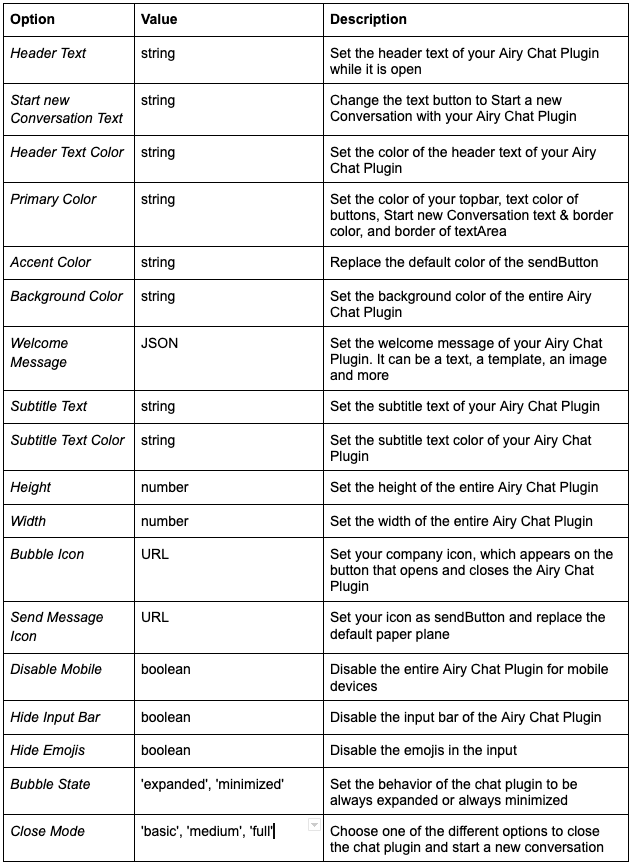
You can see an example of how the code will look once you customize these features in the image below.
Optional: Welcome Template
If you would prefer to begin all conversations with the option of a template with buttons, you must include this code within the <script></script> portion of the code snippet.
An example of the text including a hardcoded Start/Welcome template will look something like this:
<script>(function(w, d, s, n) {
       w[n] = w[n] || {};
       w[n].channelId = "your instance’s Airy Live Chat unique channelID";
       w[n].host = "https://OURCOMPANY.airy.co";
       w[n].config = {
         headerTextColor: "#474545",
         primaryColor: "#91B668",
         accentColor: "#91B668",
         backgroundColor: "#E9E8E8",
         showMode: false,
         headerText: "COMPANY Chat",
         bubbleIcon: "https://www.OURCOMPANY.com/site/img/logo.png",
         welcomeMessage: {
           fallback: "Welcome to OUR COMPANY! How can we help you today?",
           richCard: {
             standaloneCard: {
               cardContent: {
                 media: {
                   height: "MEDIUM",
                   contentInfo: {
                     altText:
                       "Welcome to OUR COMPANY! How can we help you today?",
                     fileUrl: "https://airy-platform-media.s3.amazonaws.com/CHANNEL-ID",
                   },
                 },
                 title:
                   "Welcome to OUR COMPANY! How can we help you today?",
                 description: "I have a question about:",
                 suggestions: [
                   {
                     reply: {
                       text: "Before Visiting Our Store",
                       postbackData: "COMPANY-beforevisit",
                     },
                   },
                   {
                     reply: {
                       text: "Live Shows & Livestreams",
                       postbackData: "COMPANY-shows-livestreams",
                     },
                   },
                   {
                     reply: {
                       text: "Customer Service",
                       postbackData: "COMPANY-customerservice",
                     },
                   },
                   {
                     reply: {
                       text: "News, Offers & Discounts",
                       postbackData: "COMPANY-news",
                     },
                   },
                 ],
               },
             },
           },
         },
       };
       var f = d.getElementsByTagName(s)[0],
       j = d.createElement(s);
       j.async = true;
       j.src = w[n].host + "/chatplugin/ui/s.js";
       f.parentNode.insertBefore(j, f);
     })(window, document, "script", "airy");</script>
If you choose to begin with this template, it can look something like this:

Where to Put the Code
You will copy all code within <script></script> and paste it in the head of your website.