Integrating all Communication and Customer Data with Airy and Confluent
Learn how to build world-class customer experiences by integrating your Communication and Customer Data with open-source Airy and Confluent.


A quick introduction to Airy and Confluent
Airy is an open-source data streaming platform offering an integrated solution to automate & personalize customer communication. Developers can build scalable, world-class customer experiences by integrating data from different sources in real-time.
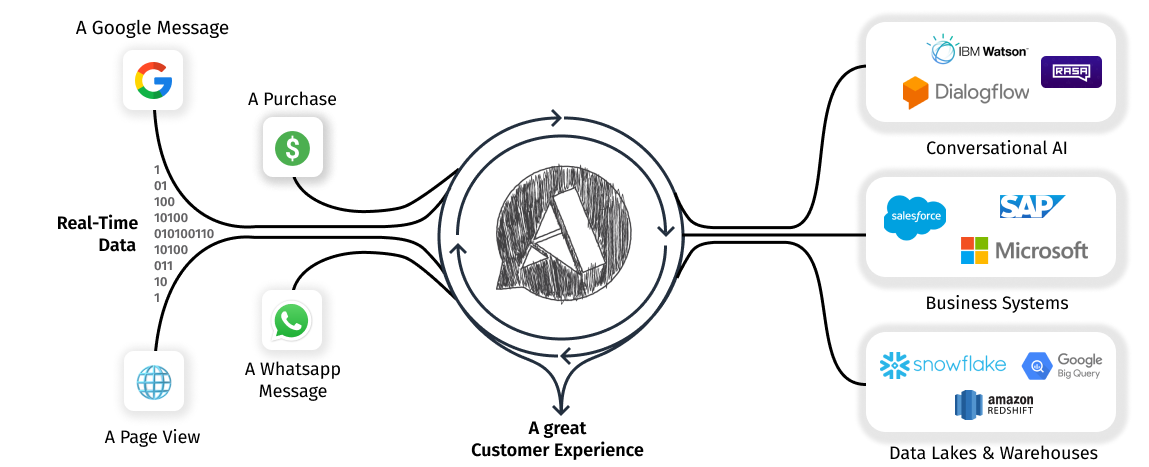
Confluent is a full-scale data streaming platform that enables developers to easily access, store and manage data as continuous, real-time streams. Built by the original creators of Apache Kafka, Confluent expands the benefits of Kafka with enterprise-grade features while removing the burden of Kafka management and monitoring.
Airy and Apache Kafka
Airy's open-source data streaming platform is powered by Apache Kafka, the open-source event streaming standard.
By default, you get a small Kafka deployment when installing Airy on your Kubernetes cluster. While this is a great way to get started and play around, we recommend our enterprise offerings and a hosted Kafka service such as Confluent Cloud for production workloads.
Confluent is the primary maintainer of Kafka and, as such, provides a very mature cloud offering. In this guide, I will show you how to set up your Confluent Kafka cluster and connect it to Airy.
Prerequisites:
- A Confluent Cloud account - Signup here
Follow the next steps to set up Airy with Confluent:
- Create a Kafka cluster on Confluent
- Obtain connection configuration
- Configure Airy to use Confluent
- Check that everything works 🎉
Step 1: Create a Kafka cluster
Assuming that you already have a Confluent account (signup here), we move on to creating the Kafka cluster by following these instructions. At the time of writing, Confluent provides a free trial that will give you plenty of time and room to explore this setup.
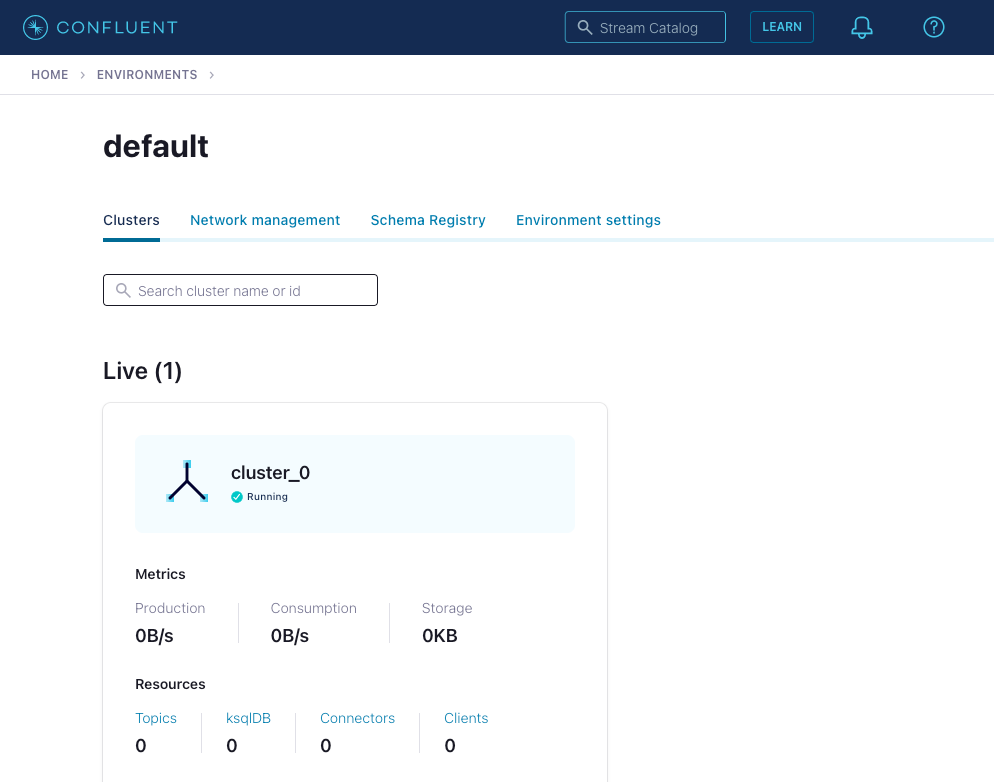
Once you are done, your environments page will show the default view with one cluster running:
Step 2: Obtain connection configuration
To connect Airy to a Confluent Kafka cluster, we need to obtain two parameters: the address of the cluster and the authentication string. Airy supports Confluent's authentication method, which is SASL/PLAIN. You can read more about Confluent's authentication process here.
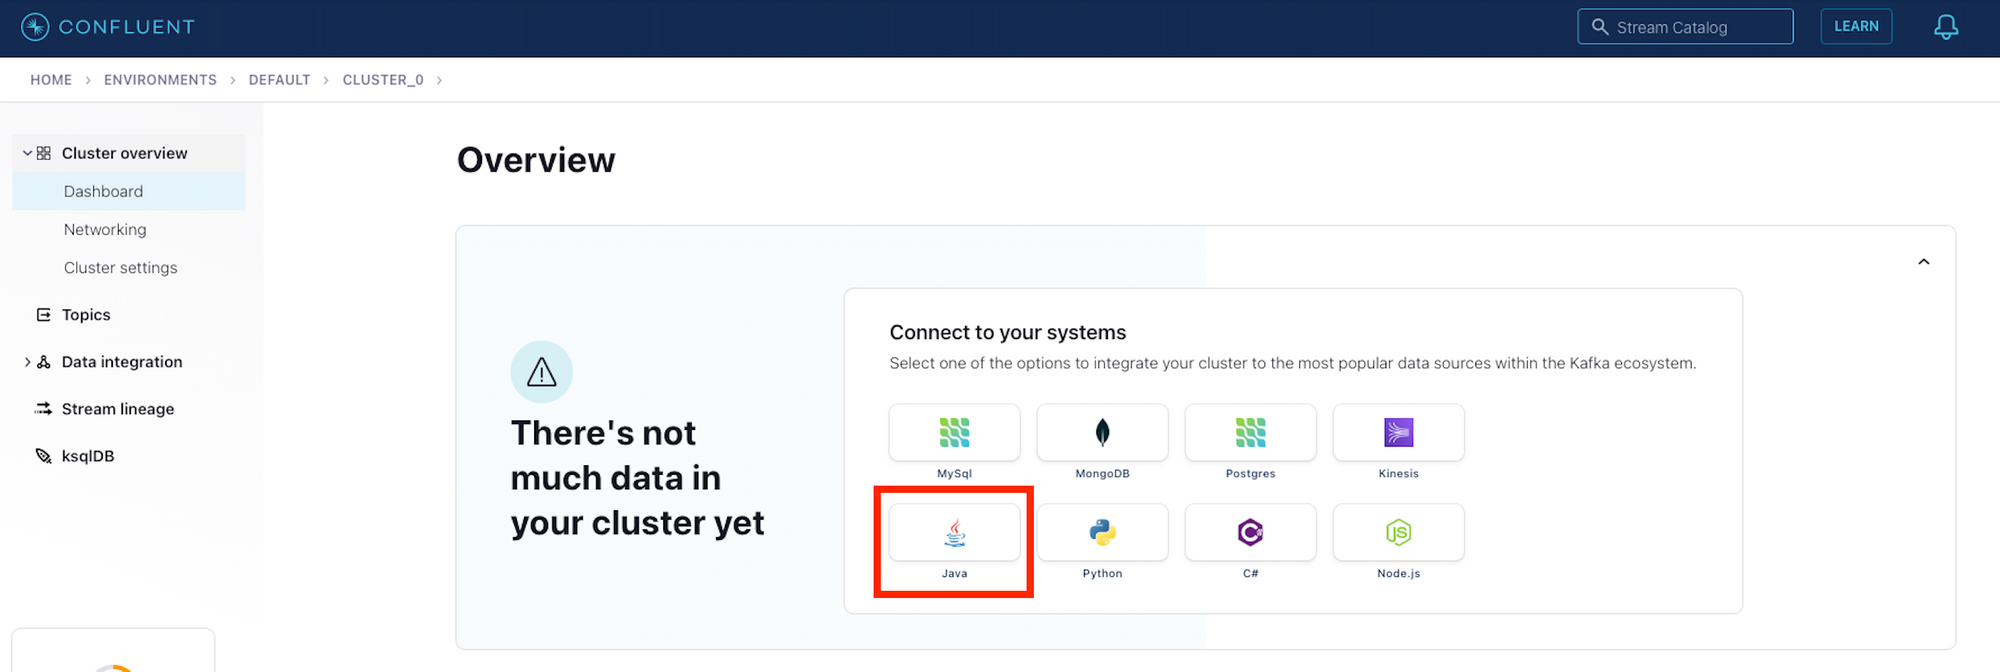
To obtain these values, click on your cluster in the Confluent dashboard and then select the Java connection option:
This will present you with the screen below. Click "Create Kafka cluster API key" to generate the parameters we need.
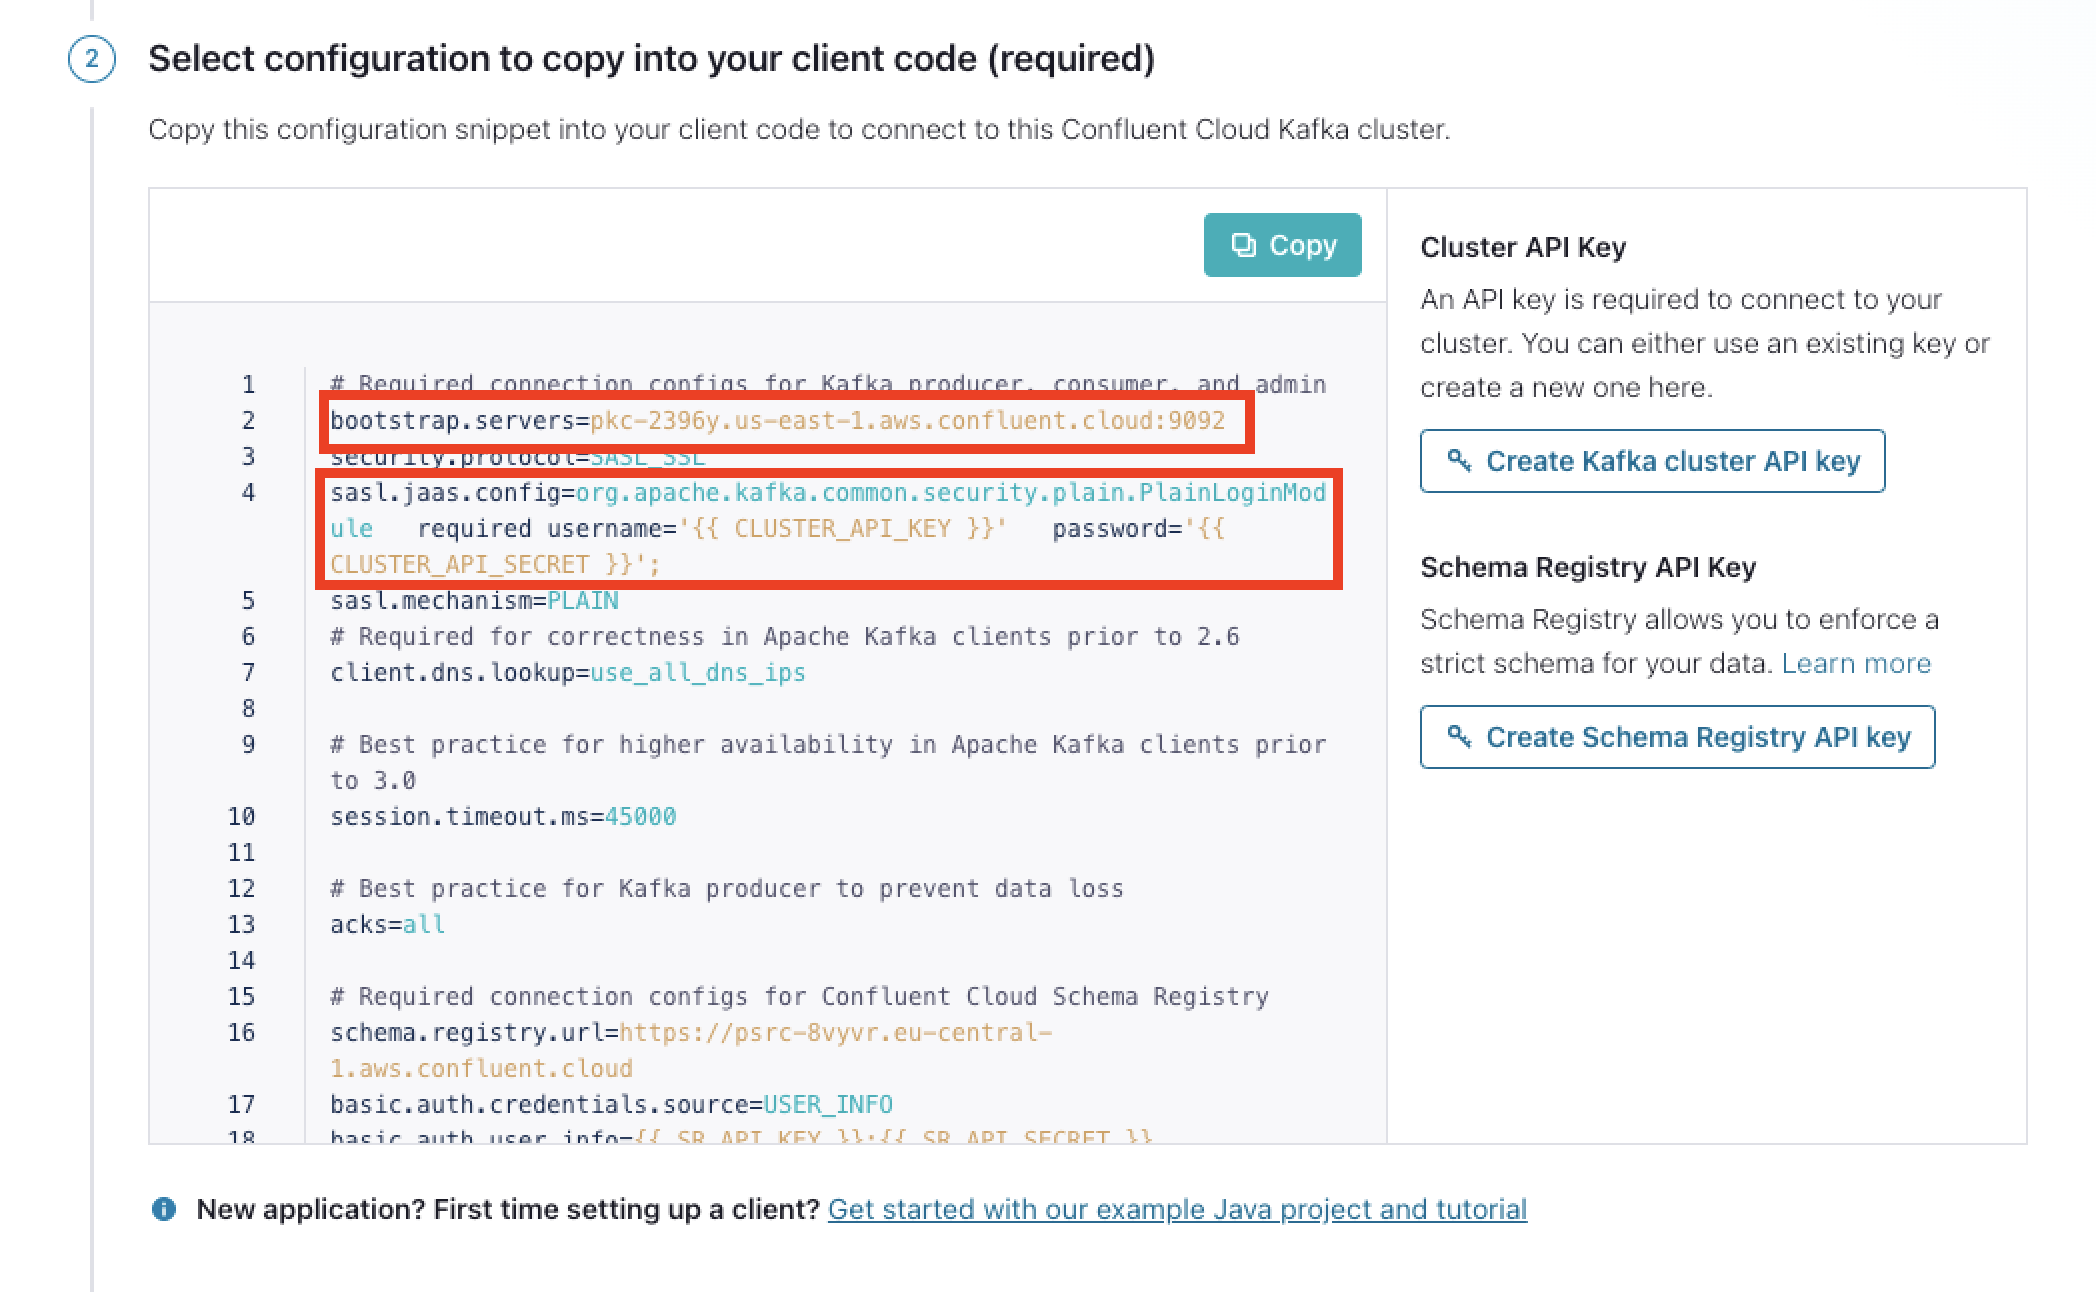
Copy/save the address from bootstrap.servers and the SASL configuration line from sasl.jaas.config (starting at "org.apache" up to and including the semicolon), lines 2 and 4 .
Step 3: Configure Airy to use Confluent
Now that we have these values, we can connect your Confluent Kafka cluster to Airy. If you are installing a new Airy instance, follow path A, and if you already have a running Airy instance, follow path B.
A. Confluent on a new Airy Instance via Helm
Follow this guide to set up your Helm installation. By default, Airy ships with its own Kafka cluster. To use your Confluent Kafka cluster from the get-go, you need to include this configuration in your airy.yaml file before running the helm install command.
config:
  kafka:
    brokers: "bootstrap.server address from Step 2"
    authJaas: "sasl.jaas.config line from Step 2"
    minimumReplicas: 3
    zookeepers: ""
    schemaRegistryUrl: http://schema-registry:8081
Now you can run these commands to install your cluster:
$ helm repo update
$ helm install airy airy/airy --timeout 15m --values ./airy.yaml
B. Confluent on an existing Airy Instance via the CLI
Note: This guide does not cover migrating existing data to a different Kafka cluster.
To connect a Confluent Kafka cluster to a running Airy Instance, include this configuration in your airy.yaml file.
kafka:
  brokers: "bootstrap.server address from Step 2"
  authJaas: "sasl.jaas.config line from Step 2"
  minimumReplicas: 3
  schemaRegistryUrl: http://schema-registry:8081
Now run airy config apply in your workspace directory to propagate these configs to our streaming apps. The difference to the helm approach is that this does not automatically create the required Kafka topics for us. So our apps will temporarily be in a crashing state until we fix this by re-running the initial topics provisioning job:
$ kubectl get job "provisioning-topics" -o json | jq 'del(.spec.selector)' | jq 'del(.spec.template.metadata.labels)' | kubectl replace --force -f -
For more details about connecting to a remote Kafka cluster and connecting your own schema registry, you can check out our documentation here.
Step 4: Check that everything works
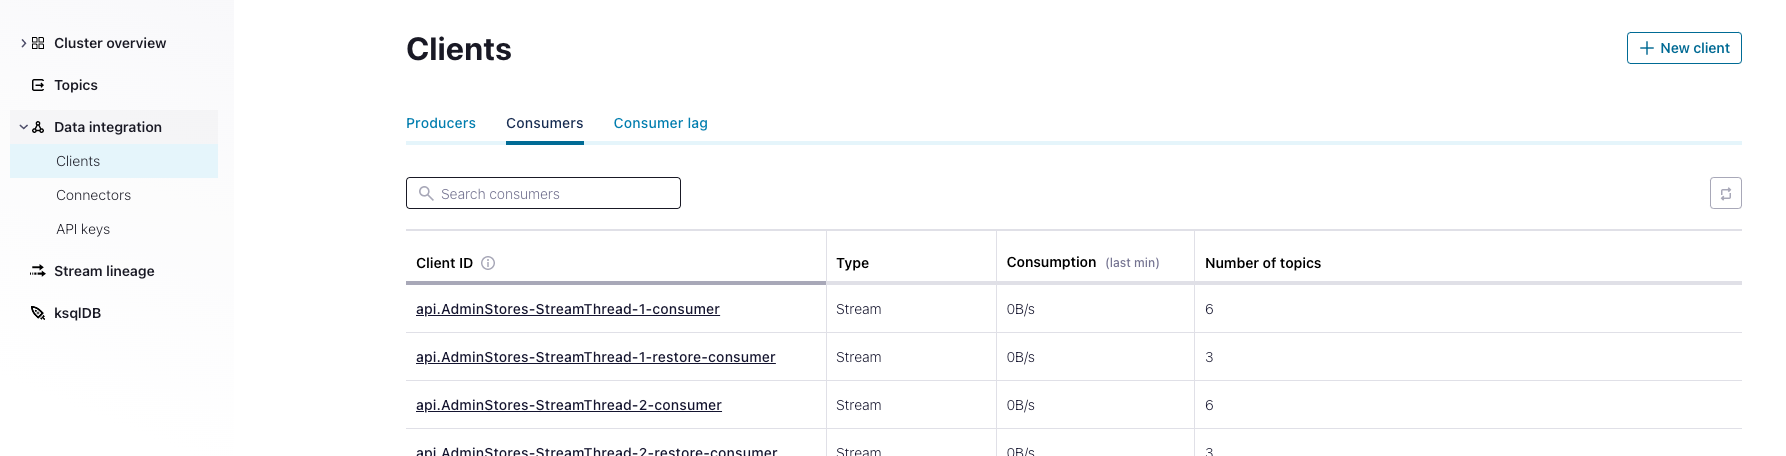
After completing either 3A or 3B, we have to wait for a few minutes for our streaming applications to start back up. Once this is done and all Kubernetes pods are stable, you should see Airy apps in the "Data Integration > Clients" view of your Confluent dashboard:
Finally, you should open up your Airy control center or inbox to ensure everything is working as expected.
Where to go from here
If you are struggling to complete this guide or want to share your journey, please join our developer slack! We'd love to meet you 🥳
And if you're interested in implementing this solution in production and at scale, we'd be happy to help!