Getting Started with Airy on AWS
This Tutorial shows you how to install and set up an Airy instance remotely on Amazon AWS from your local machine to be used in production.

This tutorial shows you how to install and set up an Airy instance remotely on Amazon Web Services (AWS) from your local machine to be used in production.
0. Make sure you have the latest versions of the AWS CLI, Airy CLI & jq running on your local machine
You should already have a configuration on your local machine for which the following things were true - or should have completed the following steps:
- The AWS CLI should be installed and properly configured on your local machine.
- Download and install the Airy CLI, in case you haven't done so yet. If you are on Mac using Homebrew, just run the following in Terminal:
brew install airyhq/airy/cli
- In Terminal, check if you have the latest
airy versionof the Airy CLI that will install the corresponding version of Airy on AWS in the next step.
airy versionVersion: 0.23.0, GitCommit: 01f187224f441d184cfeb501c2321035a17306db"- We also recommend to install the latest version of jq, which will be required during the installation process. Using Homebrew on a Mac, run the following in Terminal:
brew install jq1. Create a new remote Airy instance
- First, create or choose the directory on your local machine that you want to use to manage your remote Airy instance.
mkdir airy-aws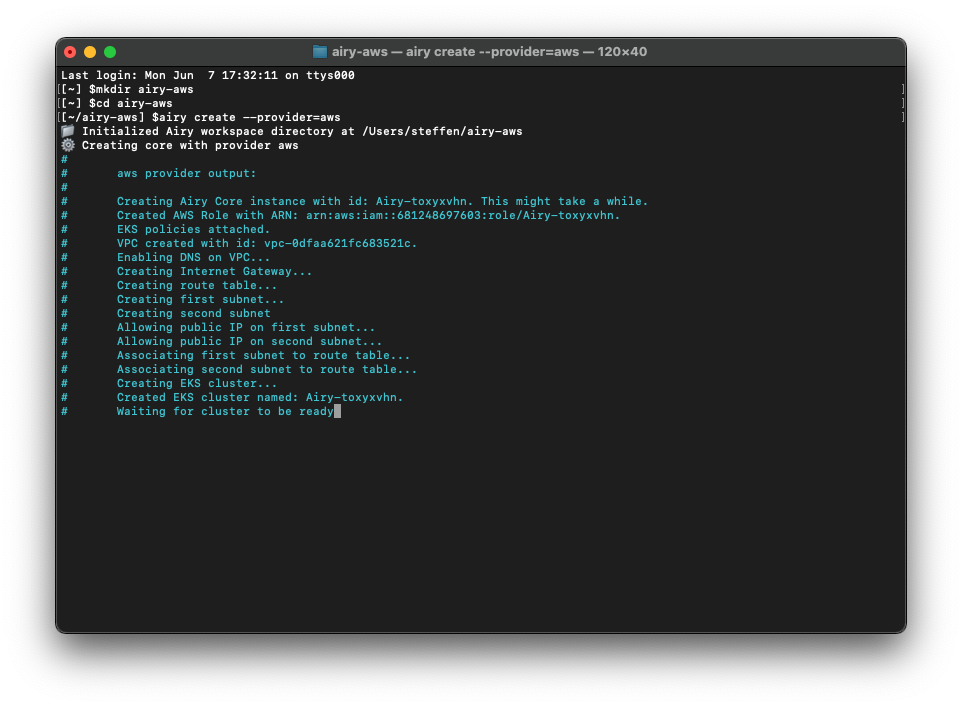
cd airy-aws- Then, remotely create a new Airy instance by running the following command in Terminal:
airy create --provider awsThis command will set up a Kubernetes cluster using AWS EKS, and will give you our recommended two c5.xlarge EC2 instances in the relevant region that your AWS profile is configured for by default. Please check the relevant pricing applicable for your region before continuing here. The overall costs for our recommended configuration might amount to about $300-350 per month in most regions.
You can customize the deployment e.g. by using different instance types (e.g. c5.large for a less powerful configuration for your Airy instance), or deploy Airy to an existing Kubernetes cluster, as outlined in the relevant section of our documentation.
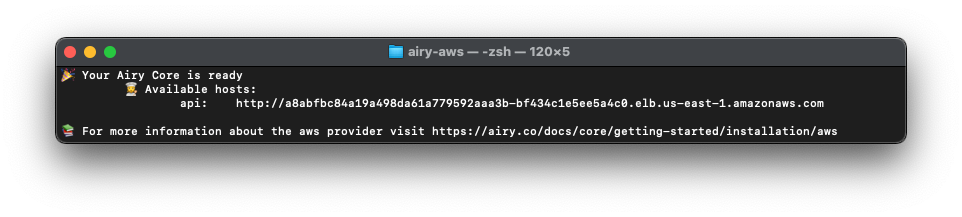
Please stay patient once you run the command. The script needs to install quite a lot of infrastructure, so this might run for about 20-30 minutes. Have a coffee in the meanwhile! ☕
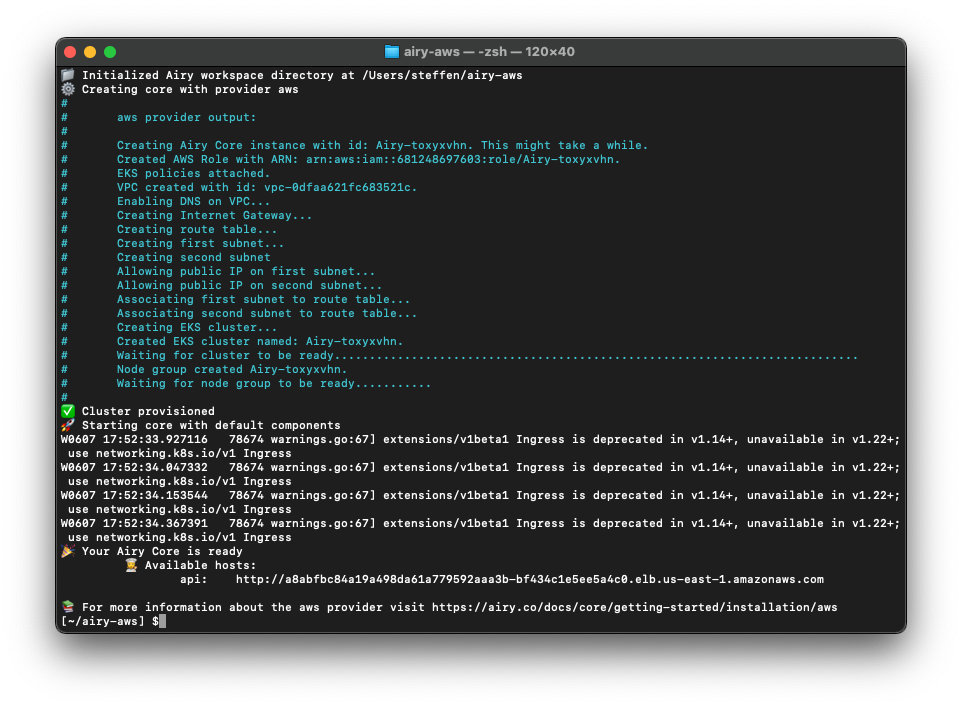
The installation script created three files for you in the directory you chose before on your local machine:
airy.yaml: The configuration file for your Airy instancecli.yaml: The configuration file for your local Airy CLIkube.conf: The configuration file for your remote Kubernetes cluster
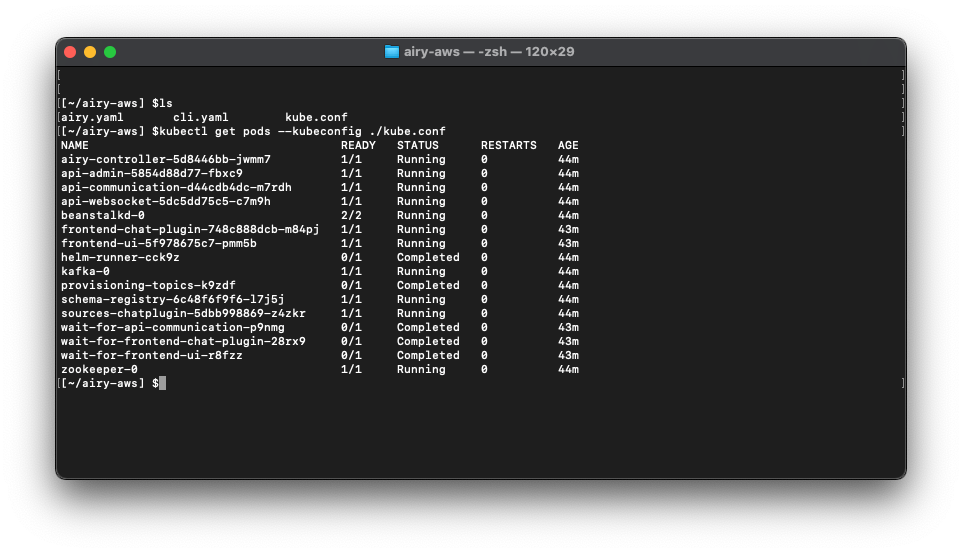
You can verify that everything has been installed correctly by looking the pods of the remote Kubernetes cluster. Just type in the following command in the relevant directory on your local machine:
kubectl get pods --kubeconfig ./kube.confThis will return a list of all the pods currently running on your remote cluster:
2. Configure HTTPS for your Airy instance
We strongly recommend to activate and configure HTTPS for your Airy instance as you should only send and receive conversational data securely. Most conversational sources such as Facebook Messenger also require you to activate HTTPS and no longer support sending or receiving messages via HTTP only.
We assume you have already acquired a SSL certificate for the domain name you intend to use for your Airy instance from your domain name registrar or provider - or you might already be in possession of a Wildcard Certificate for your domain name. As you might be aware, there are also free alternatives available such as Let's Encrypt to manage and obtain SSL certificates for the domain name you intend to use with your Airy instance.
Import your SSL certificate into Amazon Certificate Manager (ACM)
Run the following command in Terminal, specifying the SSL certificate and the private key file, as well as the certificate chain bundle file as the case may be. Please make sure to include fileb:// before the path to each file on your local machine.
aws acm import-certificate --certificate fileb://_CERTIFICATE_FILE_ \
      --certificate-chain fileb://_CERTIFICATE_CHAIN_BUNDLE_FILE_ \
--private-key fileb://_PRIVATE_KEY_FILE_ Configure the Ingress service
Run the following command in Terminal, copying and replacing _YOUR_CERTIFICATE_ARN_ with the value of CertificateArn from the previous step:
kubectl -n kube-system annotate service traefik "service.beta.kubernetes.io/aws-load-balancer-ssl-ports=443" "service.beta.kubernetes.io/aws-load-balancer-ssl-cert=_YOUR_CERTIFICATE_ARN_" --kubeconfig ./kube.confThen run the following command in Terminal:
kubectl -n kube-system patch service traefik --patch '{"spec": { "ports": [ { "name": "https", "port": 443, "protocol": "TCP", "targetPort": 80 } ] } }' --kubeconfig ./kube.confStart with exporting the Host URL that you want to use for your Airy instance that should correspond to the URL (or in case of a wildcard certificate a URL) that your certificate is issued for:
export HOST=airy.example.com Now, update the hostnames configmap and update the Ingress extensions by running the following commands in Terminal:
kubectl --kubeconfig ./kube.conf -n default patch configmap hostnames --patch '{"data": { "HOST": "https://${HOST}"} }'
kubectl --kubeconfig ./kube.conf -n default get ingress airy-core -o json | jq '(.spec.rules[0].host="${HOST}")' | kubectl --kubeconfig ./kube.conf apply -f -
kubectl --kubeconfig ./kube.conf -n default get ingress airy-core-ui -o json | jq '(.spec.rules[0].host="${HOST}")' | kubectl --kubeconfig ./kube.conf apply -f -Finally print the hostname of the Ingress service in Terminal by running this command:
kubectl -n kube-system get service traefik -o jsonpath='{.status.loadBalancer.ingress[0].hostname}' --kubeconfig ./kube.confNow, head over to your domain name registrar or provider - respectively where you manage the name servers for your domain. Please add a new CNAME entry for the relevant domain name you intend to use with your Airy instance and point it to the hostname of the Ingress service as the destination as printed above, for example:
CNAME airy.example.com ->
"abcdefgh0123456789.elb.us-east-1.amazonaws.com"
Wait for a certain time until the name servers should have been updated and DNS servers populated with the new information across the internet. You should then be able to reach your Airy instance by accessing https://<YOUR_DOMAIN>/ui from any modern web browser.
3. Secure your new Airy instance 🔐
Your Airy instance comes without pre-configured security settings to make it easy for you to run Airy on your local machine or in a safe environment. However, if you run your Airy instance in a place that is publicly reachable from the internet, like any cloud provider such as AWS, the first thing you should do is to properly secure your Airy instance.
⚠️Warning️️️: The Airy Core API as well as the Airy Inbox UI running at YOUR_PUBLIC_AIRY_URL/ui will be publicly accessible unless you implement the following steps. Please make sure to properly secure your Airy instance before you connect conversational sources or stream actual customer conversations to your Airy instance. ⚠️
Open airy.yaml with an editor of your choice and add a system token via a new systemToken parameter as well as an authentication provider of your choice by specifying an Open ID Connect configuration via the oidc parameter. We support any authentication provider that follows the Open ID Connect standard.
For example, if you decided to use Github as an authentication provider, you would need to implement the following steps:
- Look up the public URL of your Airy instance by running the command
airy api endpointin Terminal. - Create a Github OAuth App with an Authorization Callback URL in the form of
<YOUR_PUBLIC_AIRY_URL>/login/oauth2/code/github - Edit the the relevant section of your
airy.yamlfile by copying the relevant values for Github Client ID and Github Client Secret from the previous step. Additionally, specify the required parameterallowedEmailPatternsby giving a list of email addresses or a pattern of email addresses of Github users such as*@example.com, so not every Github user will be able to access your Airy instance. The security section of yourairy.yamlfile could, for example, look as follows:
security:
  allowedOrigins: '*'
  jwtSecret: <SOME_SECRET>
  systemToken: <SOME_SUPER_SECURE_TOKEN>
  oidc:
  	allowedEmailPatterns: "*@example.com,john@example.com"
    provider: "github"
    clientId: "<YOUR_GITHUB_OAUTH_CLIENT_ID>"
clientSecret: "<YOUR_GITHUB_OAUTH_CLIENT_SECRET>"- Finally, apply the configuration by running the following command in Terminal:
airy config apply- Try out to query the Airy Core API by sending the following request in Terminal:
curl --request POST \
  --url <YOUR_PUBLIC_AIRY_URL>/conversations.list \
  --header 'Authorization: Bearer <SOME_SUPER_SECURE_TOKEN>' \
--header 'Content-Type: application/json'- You can also try out to access the Airy Inbox UI in any modern web browser at
<YOUR_PUBLIC_AIRY_URL>/ui/which should lead you successfully to the Github OAuth flow and forward you back to your Airy instance upon successful authentication.
4. Connect your Conversational Sources and start to utilize Conversational Data
You are now ready to connect conversational sources such as Facebook Messenger, Google Business Messages, WhatsApp, etc. to your Airy instance.
Please read the relevant documentation on how to configure conversational sources, so you can start to connect channels and stream conversations and messages to your new Airy instance.