How to level up your customer support and AI using Airy and Rasa X
How to get the most out of your conversational AI and customer support by having your AI suggest likely responses and then training it on the selection that customer support makes.


Today we will learn how your chatbot can help your customer support agents and how they can feed your bot with new training data; all of this while providing a best-of-class experience to your users.
Background
Natural language chatbots in 2021 still follow a simple model: When a user writes a message a machine learning model reduces the message to a small set of preconfigured user intentions (short: intents), which are used to predict the next action. This is great, because machines still struggle with the fuzziness of human language, but work really well with deterministic input.

But what to do in case of multiple intents? It's not uncommon that, well-aware of how much context matters, users open a conversation with a wall of text about how they got into their predicament and what they should do next. This stops any intent-based bots dead in their tracks. Therefore it's become a common pattern to forward requests like these to human support agents. But those agents usually have to spend lots of time catching up on conversations and writing responses. And when they do it's hard to incorporate the solutions reached in these human to human conversations back into the response model.
So imagine instead of having to type an answer the bot could present you with a list of best guesses that you only have to choose from. That way you save agents time and can re-train your bot on the response selection. In this post we will explore how to do this using Rasa X and the Airy conversational platform using the following seven steps:
- Install Airy
- Install Rasa X
- Configure Rasa
- Deploy the action server
- Deploy the Airy connector
- Point Airy at Rasa
- Doing a test run
Step 1: Install Airy
To get started we need a running Airy and Rasa X installation. The fastest way to get setup with Airy is to install the CLI and then run
airy create --provider minikube my-appto install a local development environment of Airy. This requires >8Gb of available RAM so if you want you can also jump ahead and get setup for production immediately by following our guides.
The output of this command will look something like this:
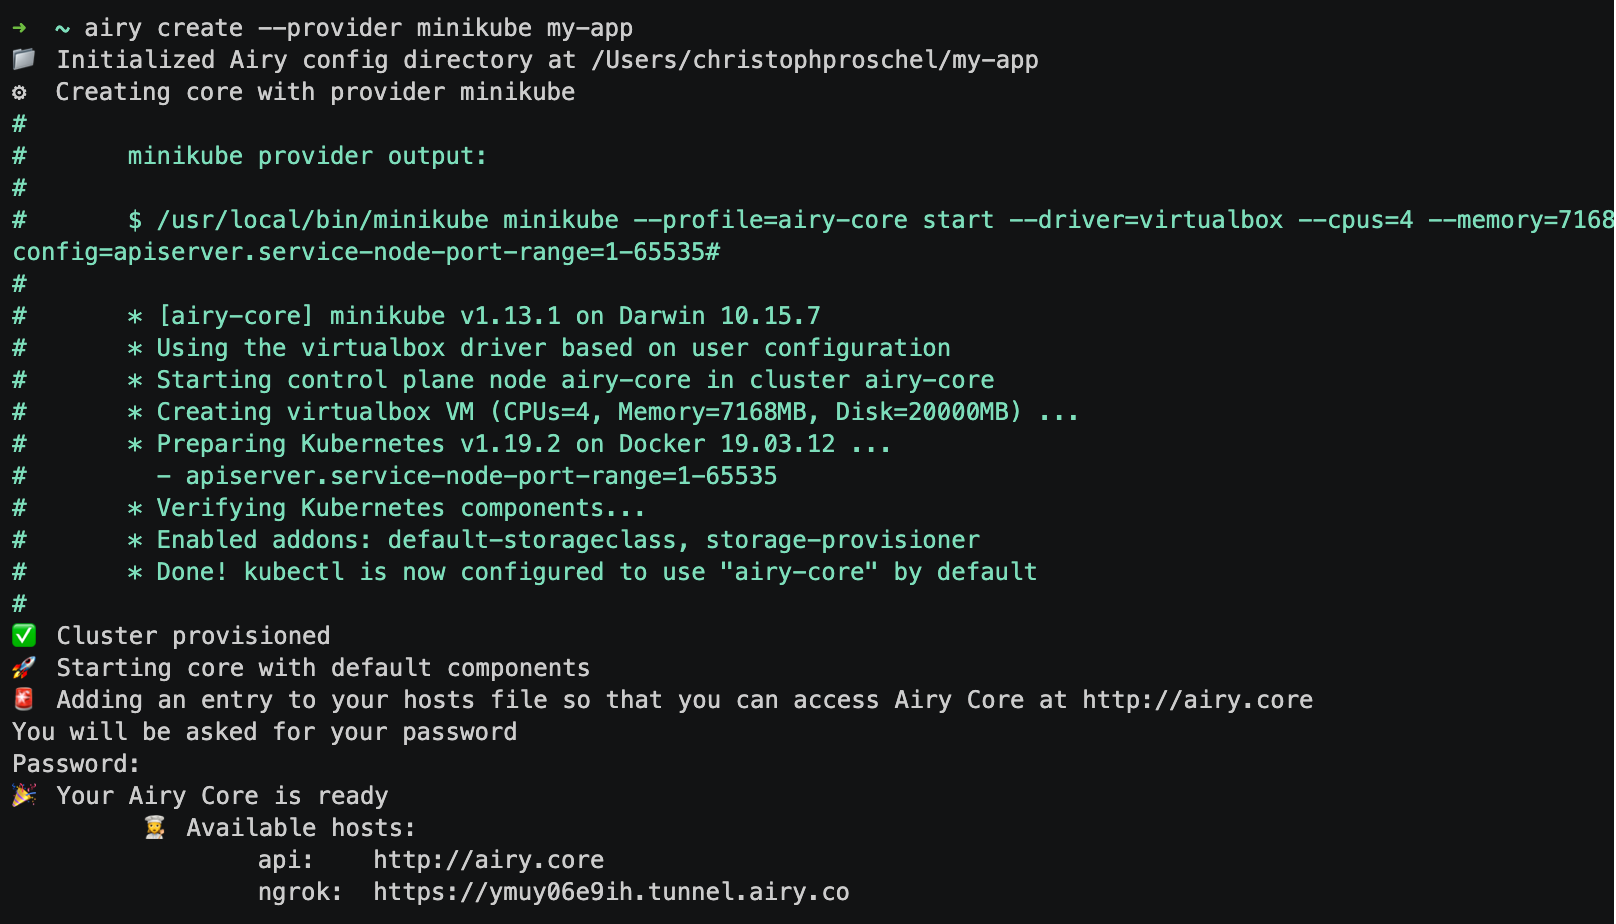
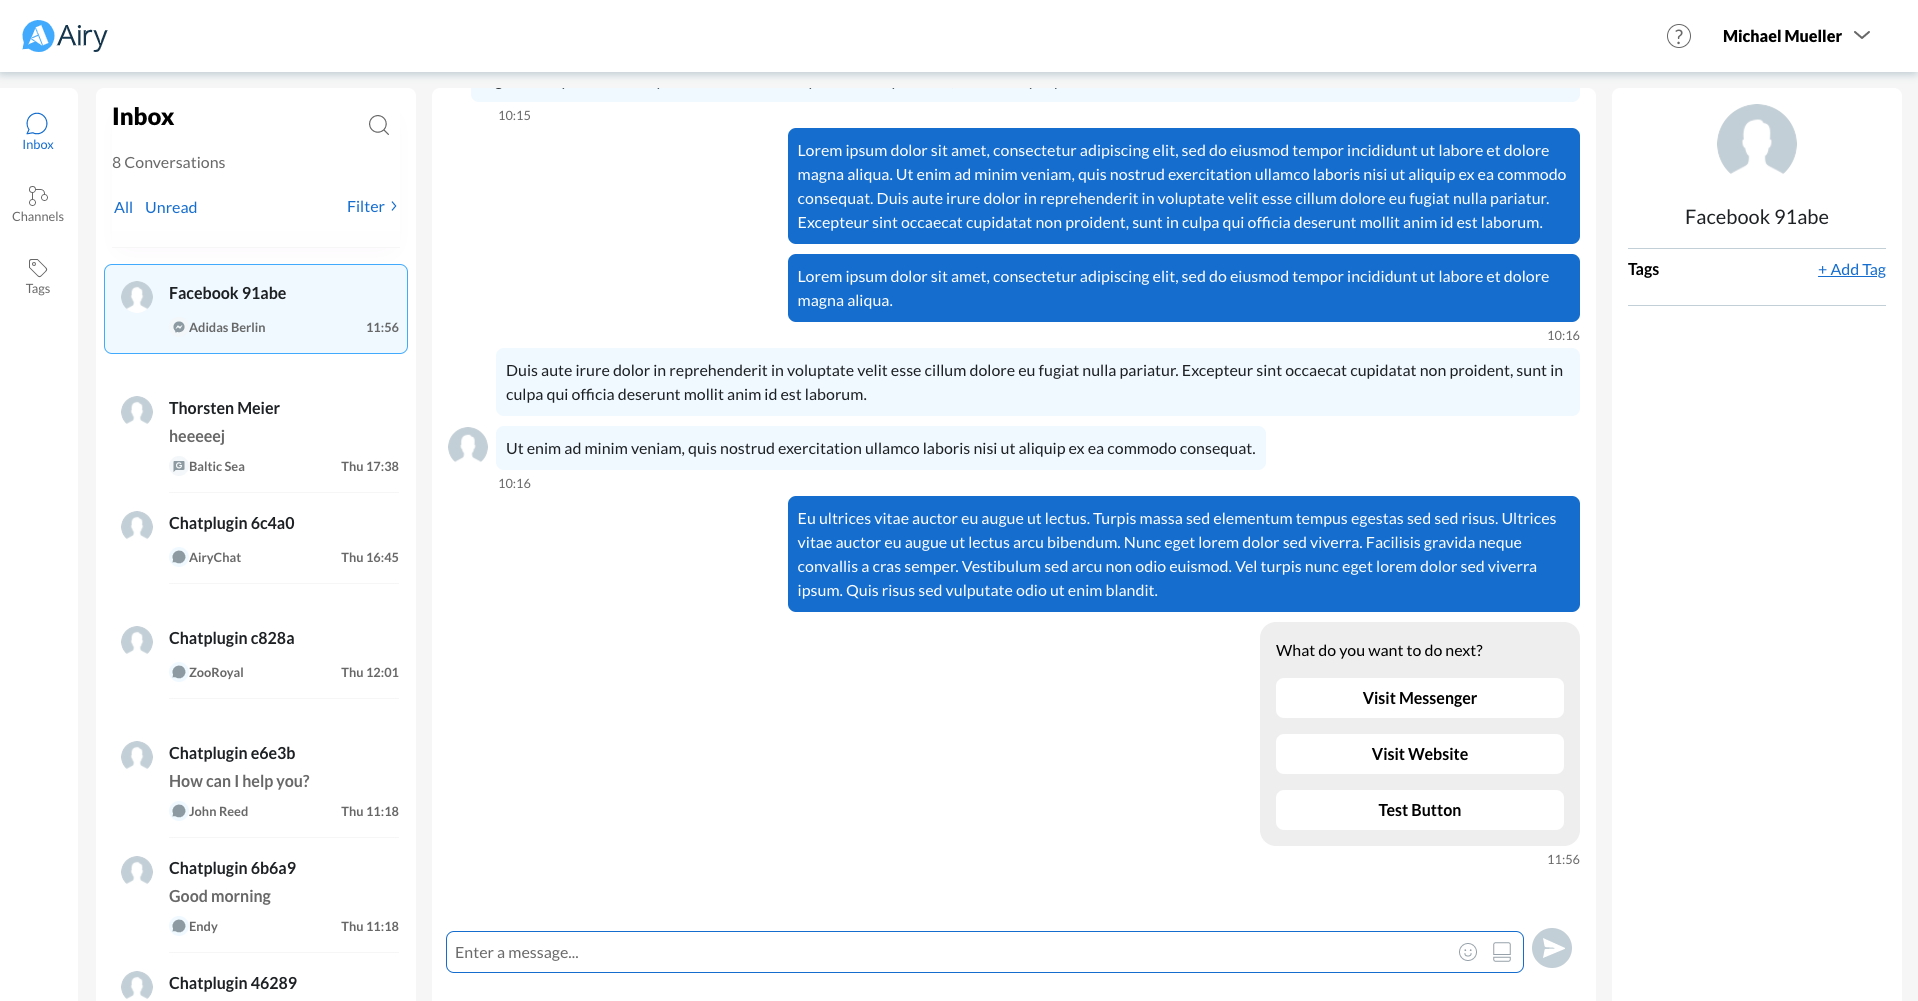
You can now open the inbox UI, where we will be responding to user messages, at http://airy.core/ui/
Step 2: Install Rasa X
To get set up with Rasa X we will follow their Server Quick Install Guide. You can use any cloud provider or already running server you like, but for this example we created a Ubuntu 20.04 VM instance on Google cloud. Be sure to check that your system fulfils the minimum requirements before installing.
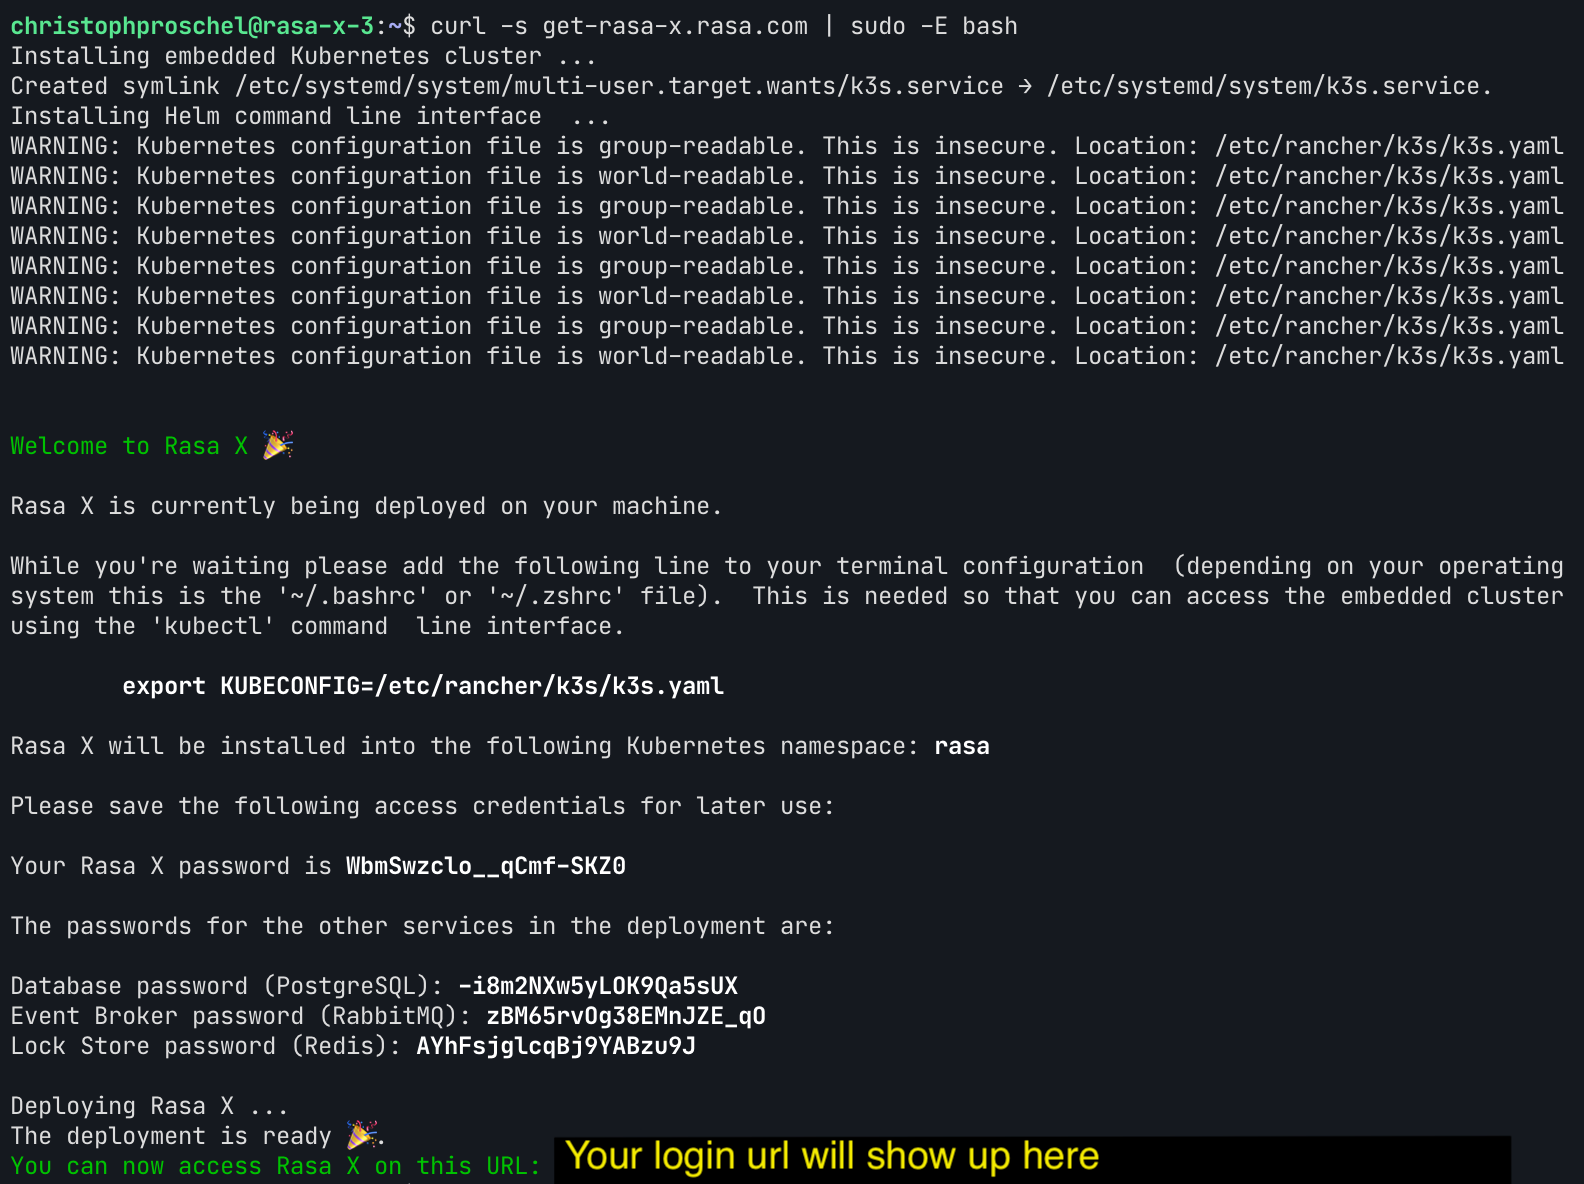
Next we execute the following command on our running VM:
curl -s get-rasa-x.rasa.com | sudo bash
This will install an embedded Kubernetes cluster with Rasa X running as a Helm chart. Take note of the login information!
Step 3: Configure Rasa
If you want to follow along and tweak things you can check out the Rasa code here: https://github.com/airyhq/rasa-x-demo
Whenever the bot is faced with a message it does not understand, we want Rasa to call a special action suggest_replies that passes a set of messages to Airy so that they can be displayed in the inbox.

suggest_replies action. This action then compiles and forward the suggestions to Airy, where customer support can make use of them. Finally the response selection ends up in Rasa X where we can use it to re-train our model.The recommended way to configure Rasa X is to connect it to a git repository. This way the following changes to your configuration files will be synced whenever you push to your version control server. You can either create a new repository by running rasa init or by forking the demo repository.
First we need to teach Rasa to handle messages that have ambiguous intents. By adding the FallbackClassifier to the NLU pipeline, we can make Rasa predict an nlu_fallback intent whenever that is the case. We also add the RulePolicy to catch any messages with a low prediction confidence and a static rule that predicts suggest_replies whenever the intent fallback occurs.
pipeline:
  # ...
  - name: FallbackClassifier
    threshold: 0.7

policies:
  - name: RulePolicy
    core_fallback_threshold: 0.7
    core_fallback_action_name: "action_suggest_replies"
    enable_fallback_prediction: True
- rule: Suggest replies to agent as a fallback
  steps:
  - intent: nlu_fallback
  - action: action_suggest_replies
  - action: action_listen
Step 4: Deploy the action server
At this point the bot will fail whenever the action_suggest_replies action is triggered, because we still haven't hosted that action with our custom action server. To do we can configure our running Rasa X instance to use the pre-built image with our action code by setting:
export ACTION_SERVER_IMAGE="ghcr.io/airyhq/rasa-x-demo/rasa"
export ACTION_SERVER_TAG="latest"
Now when we run:
curl -s get-rasa-x.rasa.com | sudo -E bashthe -E option will pass our variables to the Rasa X init script, which will configure the existing cluster for us.
Step 5: Deploy the Airy connector
In order for the rasa-production deployment to receive messages from Airy we need to deploy the same image tag we used for the action server to rasa-production and configure the credentials file.
Since the get-rasa-x script does not allow us to configure the image we manually edit the deployment by running:
kubectl edit deployment rasa-productionand replacing the image tag with ghcr.io/airyhq/rasa-x-demo/rasa:latest .
Next we need to ensure that Rasa can call your Airy API to send suggested replies. Since the default airy.core domain is only locally accessible we will exchange that domain for the default tunnel that ships with Airy. To do so run the following command on the machine that is running Airy:
echo "https://$(minikube -p airy-core kubectl -- get cm core-config -o jsonpath='{.data.CORE_ID}').tunnel.airy.co"This should yield a URL like https://kz0vto4fss.tunnel.airy.co . Next we run
kubectl edit ingress airy-coreand replace the host part with an asterisk * to match traffic from the tunnel. Finally we want to tell Rasa about this URL by running the following command on the Rasa machine:
kubectl edit cm rasa-rasa-configuration-filesand then updating the config map so that it looks like so:
apiVersion: v1
data:
  rasa-credentials: |
    rasa:
      url: http://rasa-rasa-x-rasa-x.rasa.svc:5002/api

    channels.airy.AiryInput:
      airy_host: https://kz0vto4fss.tunnel.airy.co
# ...
For this change to take effect we now need to delete all rasa-x and the rasa-production pods. This will cause them to restart and fetch the new configuration. Lastly we need to ensure that our Rasa pod is accessible from the outside so that Airy can call its webhook. We do so by exposing its service as a load balancer:
kubectl expose service rasa-rasa-x-rasa-production rasa-production-load-balancer --type LoadBalancer --port 5005 --target-port 5005
Now your Airy Rasa webhook should be publicly available at http://your.vm.ip.address:5005/webhooks/webhook/airy. NOTE: Check your firewall rules on an instance and on a provider level to make sure that your VM can send and receive requests at port 5005
Step 6: Point Airy at Rasa
Now that our Rasa instance is ready to send and receive events to and from Airy we need to point our Airy webhook to it. To do so we call the webhook subscribe endpoint like so:
curl --request POST \
  --url http://airy.core/webhooks.subscribe \
  --header 'Content-Type: application/json' \
  --data '{"url": "http://your.vm.ip.address:5005/webhooks/webhook/airy"}'
Where the url part of the payload is the Rasa webhook url we exposed in the previous step. Once this is done your Airy instance should forward all its messages to Rasa.
Step 7: Doing a test run
You can test this setup by sending an example message to the Airy website ChatPlugin. If you are new to Airy the fastest way to do so is by following our Chat Plugin quickstart guide. Once you have sent a message, the bot should reply and the message should show up in Rasa X.
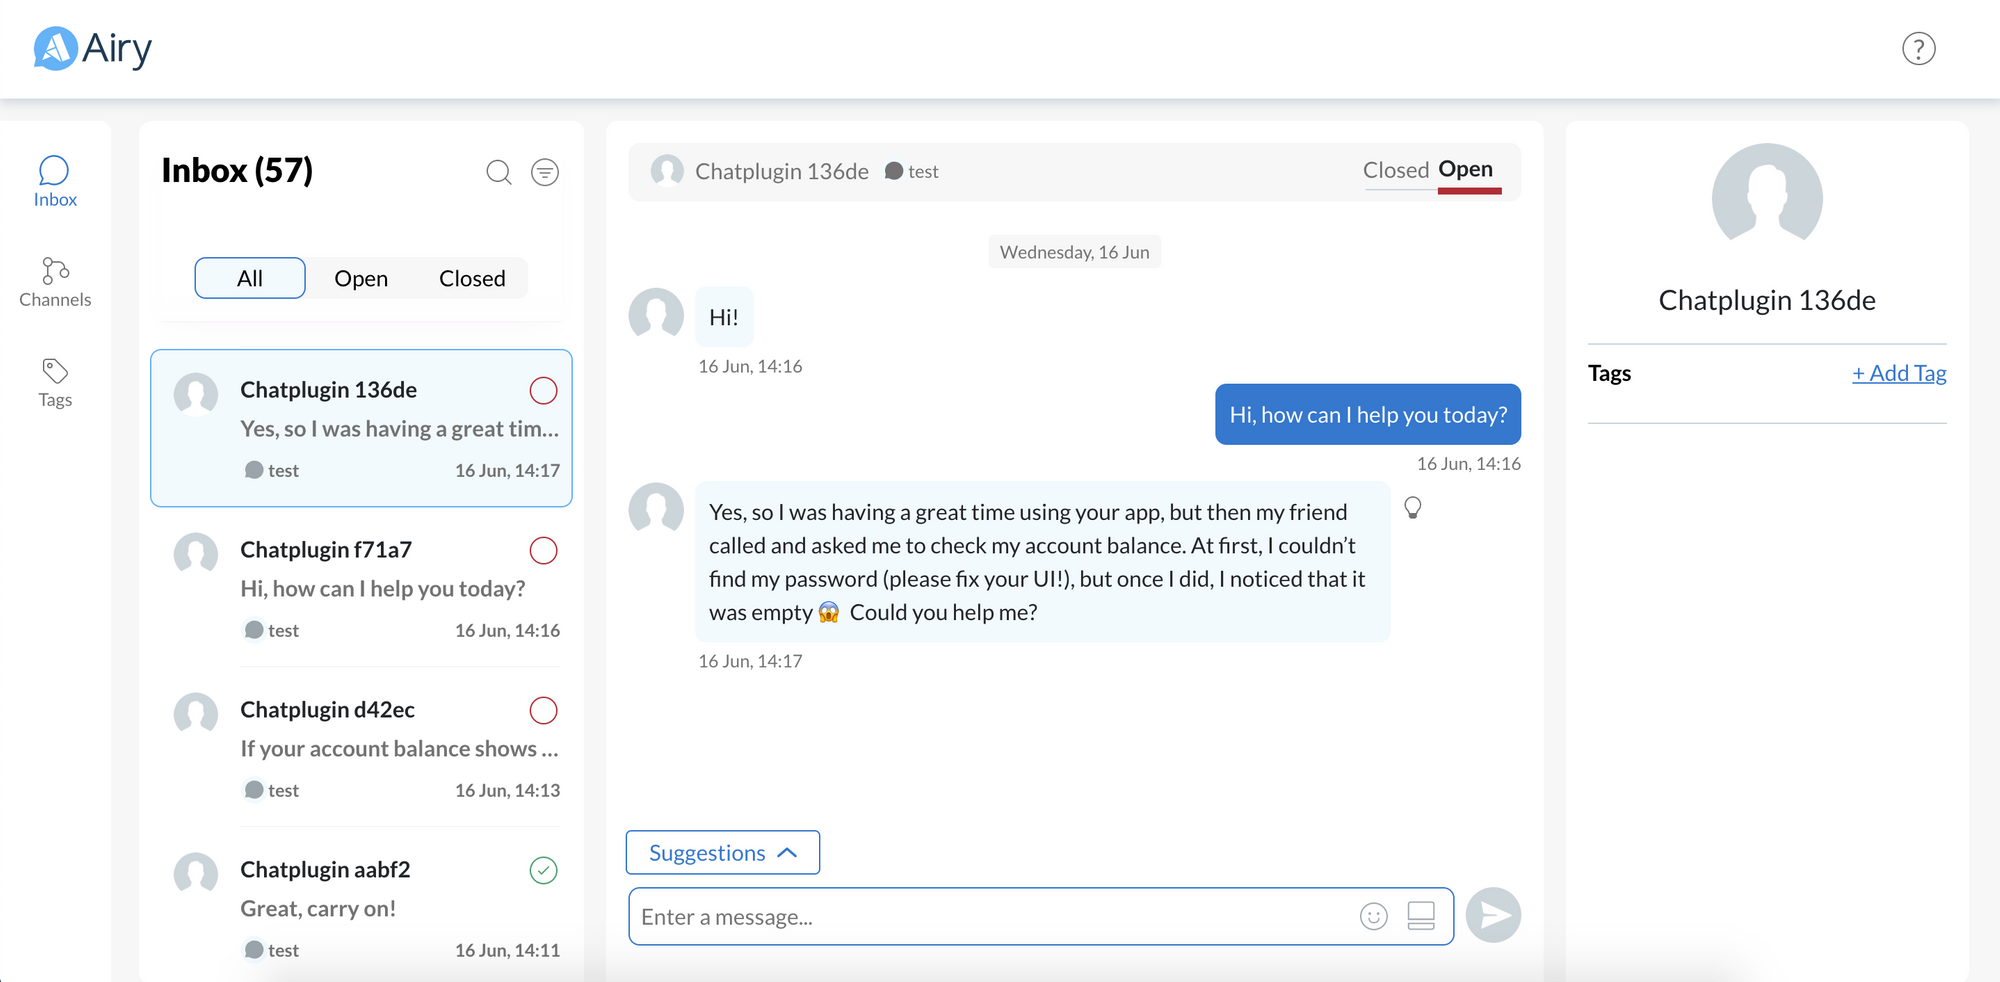
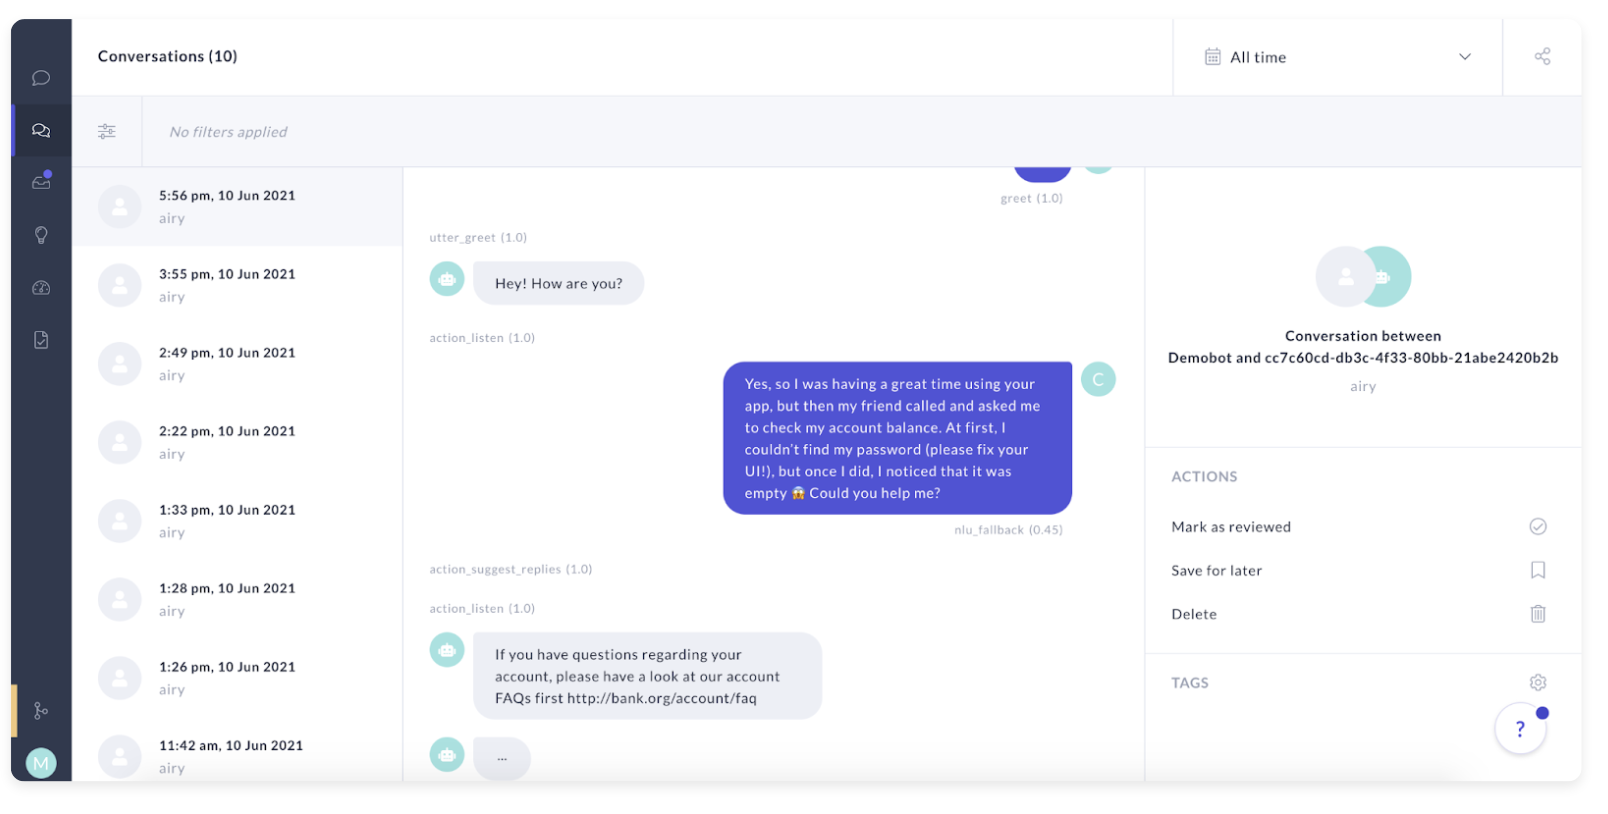
Now in the screenshot above I have sent a greeting to which the Rasa bot replied. Next I've sent an example message aimed at generating ambiguous intents. As you can see there is now a suggestions box right above the input bar. When I click that I'm being presented with the suggested replies that the bot generated.

If you know open your Rasa X installation you should see the conversation appearing in the conversations tab. Here you can now copy and modify the user story and use it to train a new model.
Benefits
To recap: You now have a tool that when your bot needs to fallback on customer support it can, in most cases, provide them with response suggestions.
Save customer support time
Catching up on the context of a conversation and crafting a high quality, grammatically correct response is very time consuming. With this approach your agents can simply moderate many of their conversations.
Get more labelled training data
Usually when we hand over to customer support the ensuing conversation is hard to decipher and map back to a desired bot model. By using response selections you get an entirely new dataset of real conversations to train on.
Greatly improve user experience
By training the bots on the response selection of the user given the user message you are in essence "filling the gaps" of your bots coverage. This means faster and more accurate responses for future interactions.
This interaction pattern also implements a new paradigm in chatbot design: Conversation Driven Development (CDD), in which you start with a very simple bot and rapidly iterate using real world data to get a better experience both faster and cheaper.
Limitations
- Currently replies are only suggested during the handover.
- Depending on your NLU engine intent ambiguity can be hard to train for, since Rasa for instance tends to give a stark confidence contrast between predictions.
- Fairly complex deployment.
Where to go from here
If you are struggling to complete this guide or want to share your journey, you can join our Developer slack!
And if you're interested in implementing this solution in production and at scale, we'd be happy to help you!